Learn how to engage with more brands and an even larger audience by creating your very own Instagram Reels and Stories.
Social media is growing bigger and bigger every day and I am sure you know that it is essential for your business. Instagram Reels are what you need to gain more and more followers and more engagement and reach for your business.
Since 2019, when the Reel feature was launched it has become Instagram's fastest-growing feature as well as recording an average 2.54% video view rate, while regular Instagram videos reach only 1.74%.
But you are probably wondering how you do this? This guide is here to help and show you how to gain new followers and engagement whilst showing your brand. In this guide, we will cover everything you need to know from tips to tricks.
What are Instagram Reels:
Instagram reels are immersive videos which allow you to get as creative as possible and express yourself or your brand. It is a fun way to educate your audience and keep up with the latest trends. A lot of people engage in Reels to participate in cultural trends and the community as well as gathering inspiration for new ideas.
Reels allow you to create and edit up to 90-second videos, as well as adding effects and music or even your own audio.
The most insane part about reels is; they are so supported by Instagram Algorithm which means your content is more likely to be recommended on accounts that don't follow you. Which is huge for everyone trying to engage a new audience and following and massively big for Social Marketers.
How to create a Reel:
Step 1: Create a reel
Creating a reel is just like creating a story. Simply go onto your profile page and click the plus sign and click “reel”.
Step 2: Recording
Now that you are onto the reel layout you can either film content straight away or access it from your camera roll and upload it in.
- Reels can be recorded in sections so you do not have to film it all in one go.
- As well, if you are filming content straight from the app and want to come back to it later you can simply add it to your “drafts” and come back to it and edit or continue recording when you have the time.

Step 3: Add content!
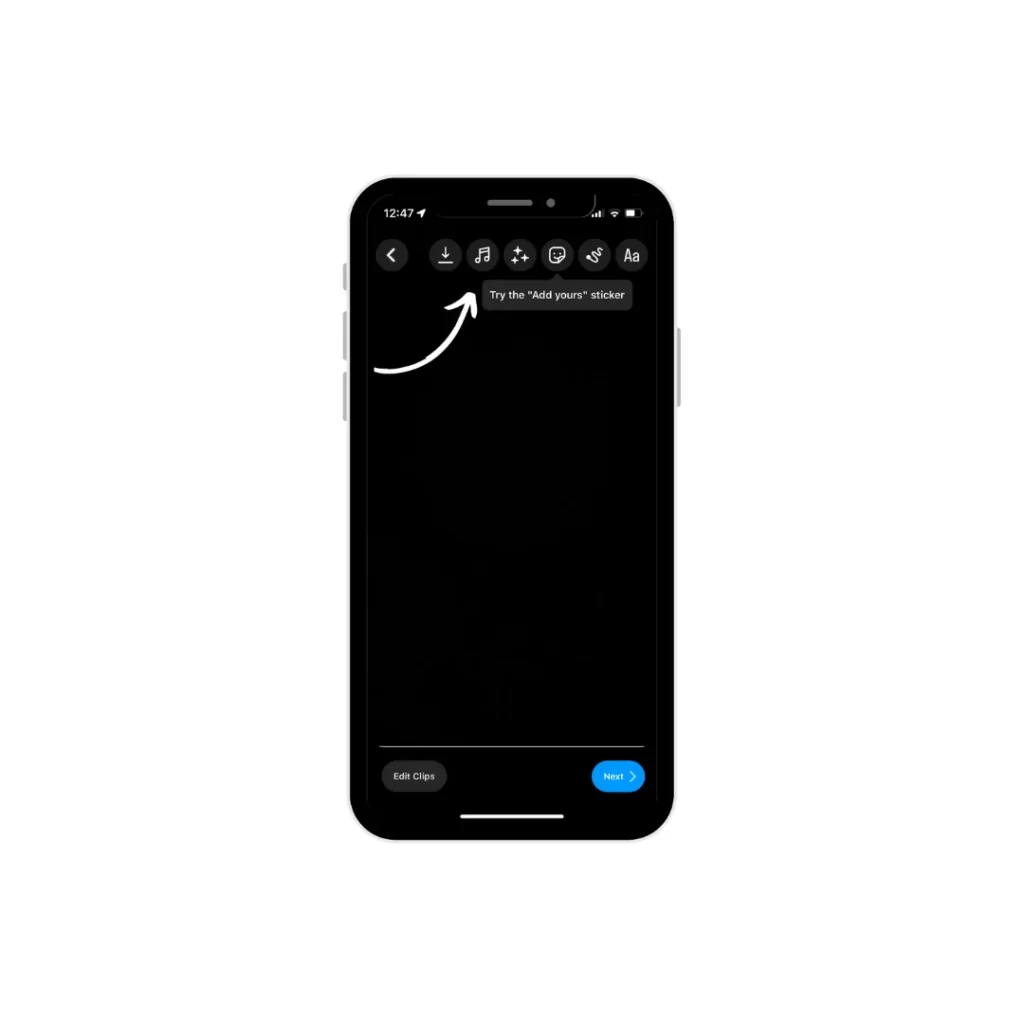
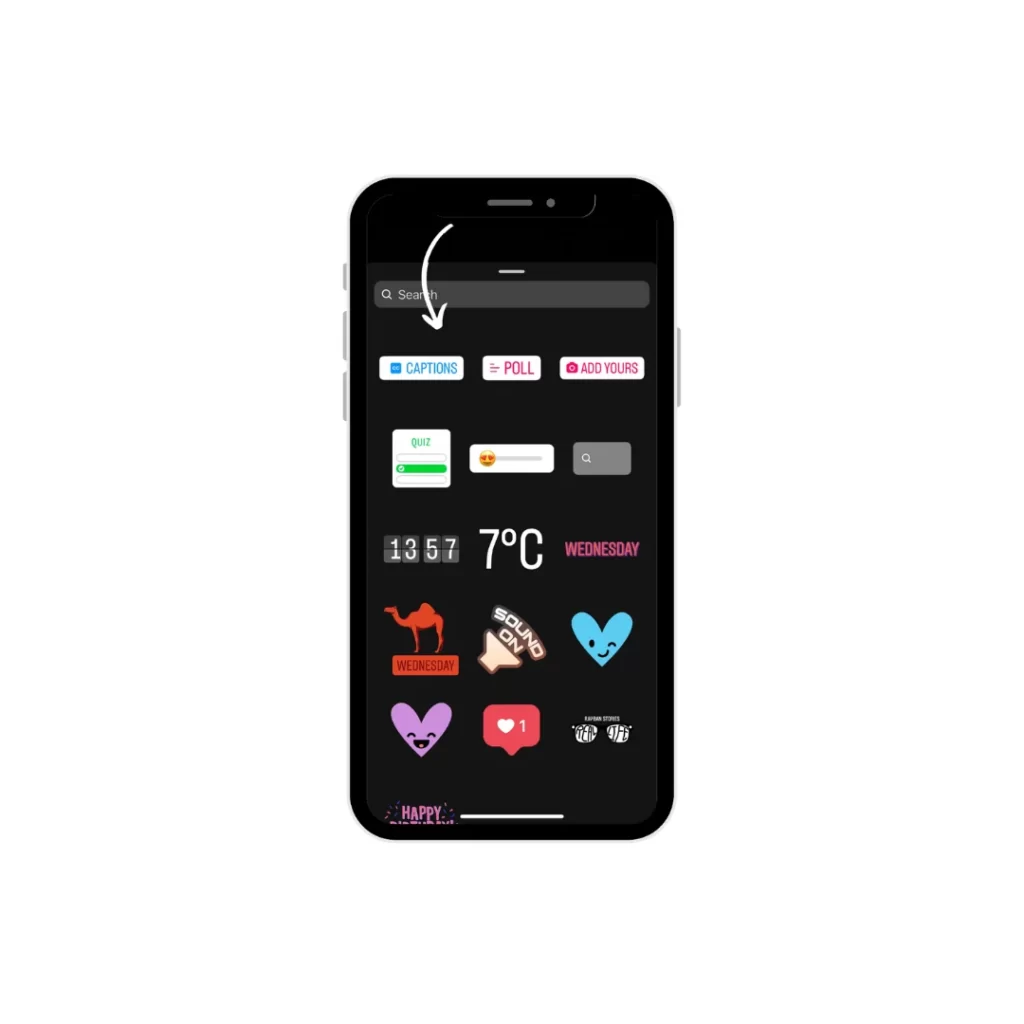
Once you have shot or uploaded your content you can add stickers, drawings and text to your reel using the tools at the top.
With stickers, drawings and text you can schedule them in when editing to fit a certain part of the content so it isn't on the content at all times.
Step 4: Get ready for upload!
Once you have added all the features and are happy with your reel it is now time to get it ready for upload!

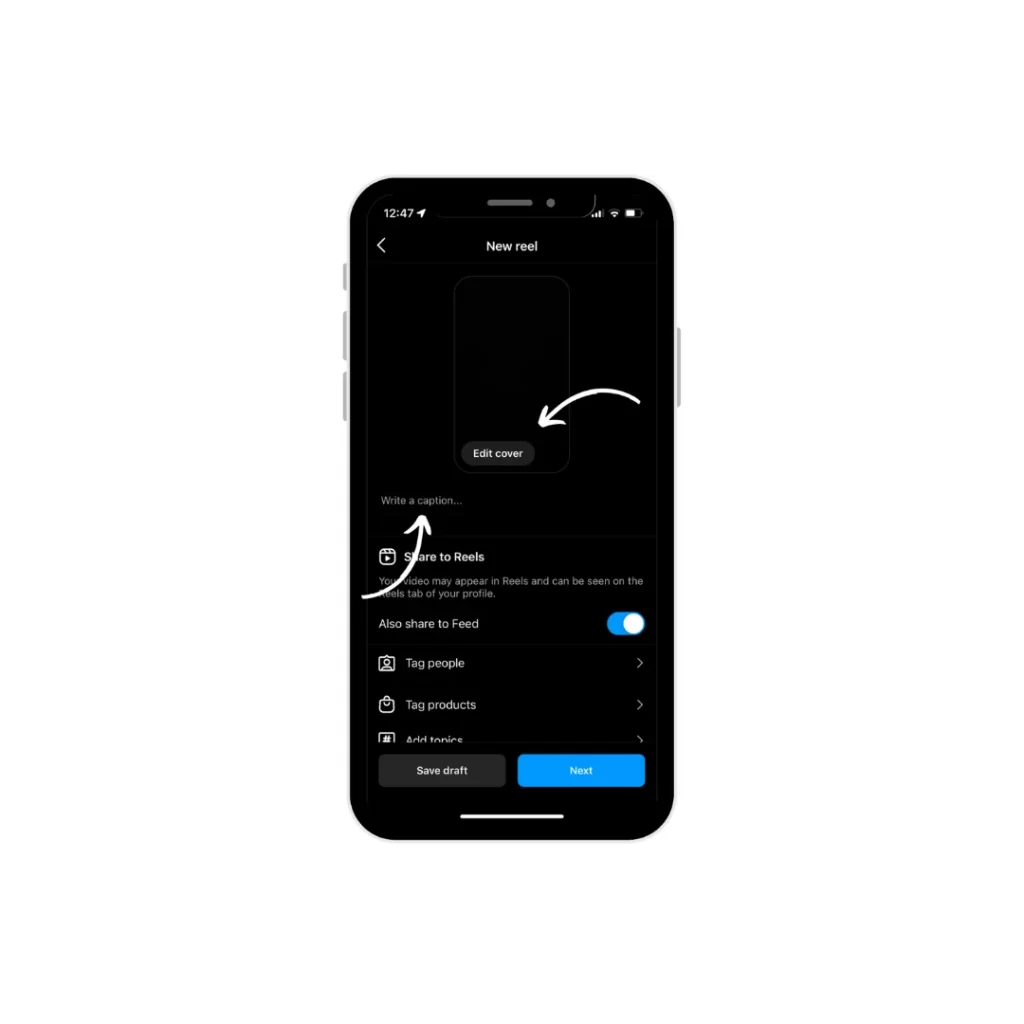
With your reel it will display as a grid post and in the reel section, so with a reel you can select a “cover” either from your camera roll or from the content you have produced. Once you have picked a cover it is then time to write a caption just like you would with an Instagram grid post, although with a reel the audience focuses on the content produced whereas with a grid post they look at both the content and caption.
- The caption can be as long or short as you would like, however, the main focus should be on the content produced and also the hashtags you are using.
- Hashtags added to your Reels will really help more people engage - especially if you use trending hashtags as well as sounds.
Step 5: Time to upload!
Once you have selected your cover and added a caption and maybe even added your location (if that's what you'd prefer) then it's time to upload! If you are not wanting to upload your reel straight away you can just add it back into your drafts just like before in a previous step.
What is the difference between Instagram stories and Reels:
As much as Instagram allows you to post reels to your story and allows you to share with friends and family, they are very different. The main difference is stories disappear automatically after 24 hours, whereas a reel will not unless you delete it yourself.
As well as Reels being public to a wide audience, they are a great way to discover businesses and creators. Whereas stories are only viewed by the accounts set audience who are classed as followers.
What are Instagram Stories:
An Instagram Story is a type of feature which is created on the Instagram App, allowing users to post photos or videos that automatically disappear after 24 hours without needing to do anything. They appear in a portrait format only and allow you to create your own touch onto them with the use of gifts, stickers, text, more imagery and other fun things!
When you post a story it notifies your audience with a colourful ring which is circled around your profile picture. This is created so it tells your audience that they can tap on your profile picture and they will see something new.
Instagram Stories are the perfect way for businesses to experiment and see what works for them as they are not permanent. Smaller businesses tend to create stories a lot to post everything from FAQs, to new launches, to unedited videos to show their everyday.
How to post an Instagram Story
Now I have given you an insight into what an Instagram story is; let's show you how to create your very own.
Step 1: Create your own story
Go to your home page or profile page whichever you prefer and click the plus sign - if you are coming from your home page click the plus sign on your profile picture, if you are coming from your homepage and you have clicked your profile picture it will take you straight to add a story. If you are coming from your profile it will give you options: reel, post, story, story highlight, live, guide and fundraiser. Feel free to click whichever catches your eye - however for this guide we are helping you create your own story.

Step 2: Upload content
Now you have reached the camera application and can probably see your stunning face in the camera we can now get started.
With a story, you can create brand new content by taking the picture there and then, or you can upload previous content from your camera roll, to do this you just need to swipe up the screen and click an image.
- If you choose to upload an existing image take note of the dimensions; 1080px by 1920px.
- If you decide to create your content on the spot, there are different layouts for you.

Step 3: Add effects and more
Once you have done this, you can add your own text, gifs or stickers and effects as well as adding a poll, mentioning other accounts and other fun things!
Once this is all completed, you are ready to upload. To upload your story you can do it there and then or if you are a busy business that doesn't have time to remember to upload content you can get different scheduling platforms which will do it for you.
Story Highlights
Finally, there is a feature called story highlights. This feature allows you to keep all your previous stories rather than disappearing after 24 hours, you can keep hold of them and place them into different folders.
Story Highlights are placed on your profile below your bio, this is one of the first things your audience will see. Most businesses use their highlights to show the meaning behind their brand, their team, products, menu lists etc, and reviews. It is such a good way for a business to keep information which is important on their social media rather than the audience having to go all the way to the website.


